Welcome
The ESP32 application connects the Apple II Disk II bridge to Wi-Fi and to the Apple II Share remote API. This guide explains the web interface, Wi-Fi setup, remote API settings, and file transfers.
Back to Sign inESP32 application workflow
First-time Wi-Fi setup (Access Point mode)
If the ESP32 has no saved Wi-Fi username/SSID and password, it starts as a protected Wi-Fi Access Point. On your phone, tablet, or computer, open the Wi-Fi network list and connect to A2DISK-SETUP.
The AP password is 12345678. After connecting, open http://192.168.4.1 in a browser. This address is the ESP32 setup page; mobile data should be temporarily disabled so the browser stays connected to the ESP32.
In the Wi-Fi settings section, enter the SSID (network name) and password of the Wi-Fi network that the ESP32 should use. Save the settings and restart the device. The ESP32 will leave AP mode and try to connect as a Wi-Fi client (STA). Your phone or computer must then reconnect to the normal Wi-Fi network.
Once connected, find the device IP address in the status information and use that address, or http://apple2share.local when mDNS is available.
Open the ESP32 web interface
Connect your computer or phone to the same Wi-Fi network as the ESP32. Open http://apple2share.local or the device IP address shown by the ESP32 monitor.
Check the device status
The application starts on Local files. Use the navigation buttons to open apple2share.com, Floppy, Settings, or Firmware.
Configure the remote API
In Settings, configure the remote API credentials. The API base URL should include the scheme, for example http://api.apple2share.com.
After saving, verify the displayed DNS main, backup, and fallback values. The remote API URL should retain http:// or https://.
Browse and download remote files
Open apple2share.com and select Refresh apple2share.com. Select Download next to a remote file to save it to ESP32 local storage.
Manage local files
Use Upload to send a local file to the remote API and Delete to remove it from local ESP32 storage. Use Refresh local files to update the list.
Settings reference
- DNS main / backup / fallback: DNS servers currently reported by the Wi-Fi network.
- API base URL: remote API address, including
http://orhttps://. - API username and password: credentials of the API user.
- API UserKey: the matching key for that API user.
- Restart: restarts the ESP32 after configuration changes.
Real ESP32 screen examples
Local files
This page displays files currently stored in the ESP32 local storage. The storage summary shows used files, free space, and total space.
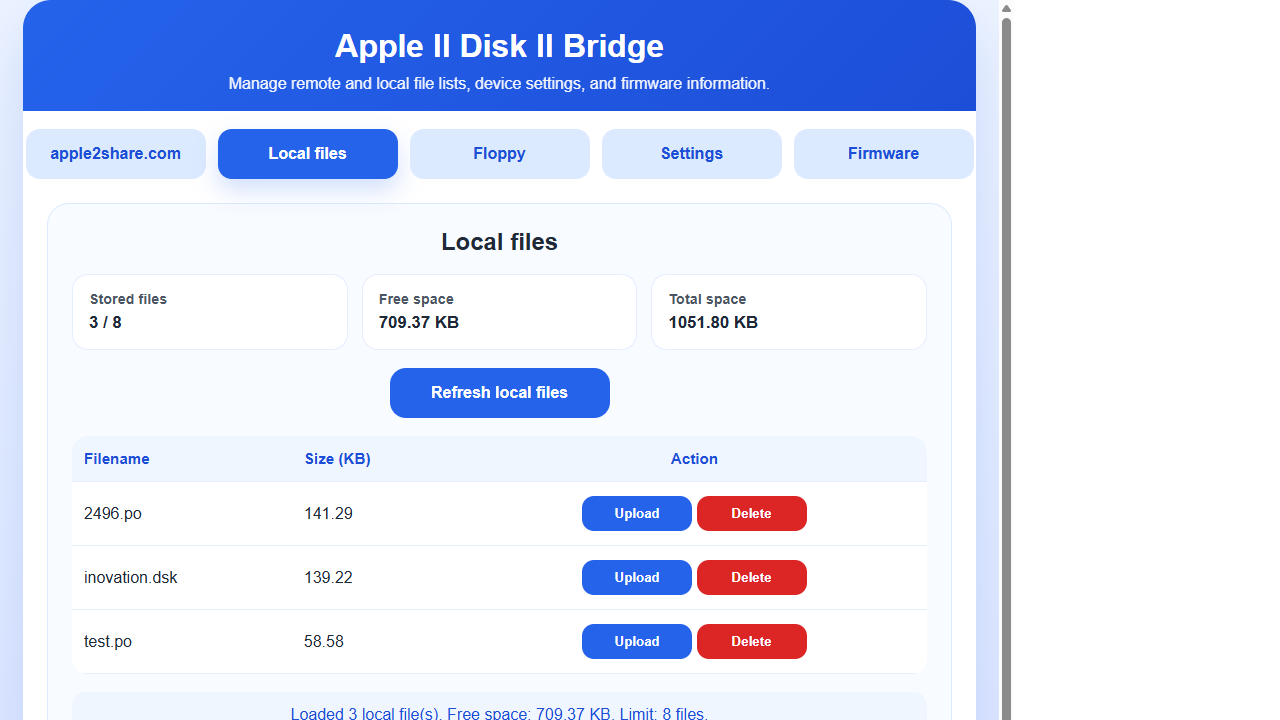
Use Refresh local files to reload the list. The Upload button sends the selected local file to the remote API, while Delete removes it from the ESP32 storage.
Remote files
The remote files page displays the API connection details and the files available to the configured user. Select Download to copy a remote file to the ESP32 local storage.
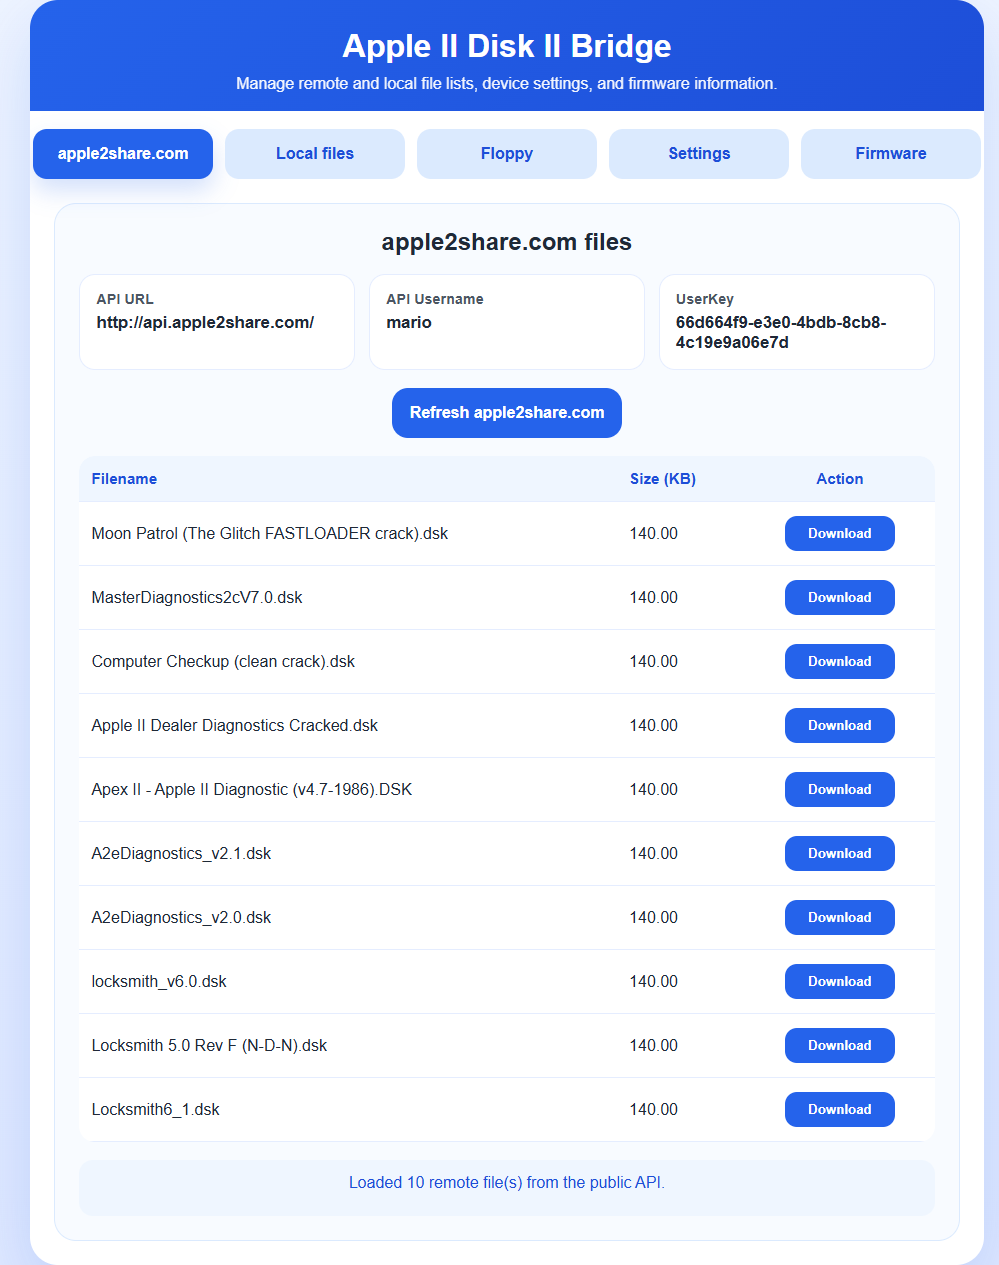
In this example the API is configured for user mario. The list is loaded from http://api.apple2share.com/ and each file has a Download action.
Settings
The Settings page shows the active Wi-Fi connection, IP address, DNS servers, device name, and remote API configuration.
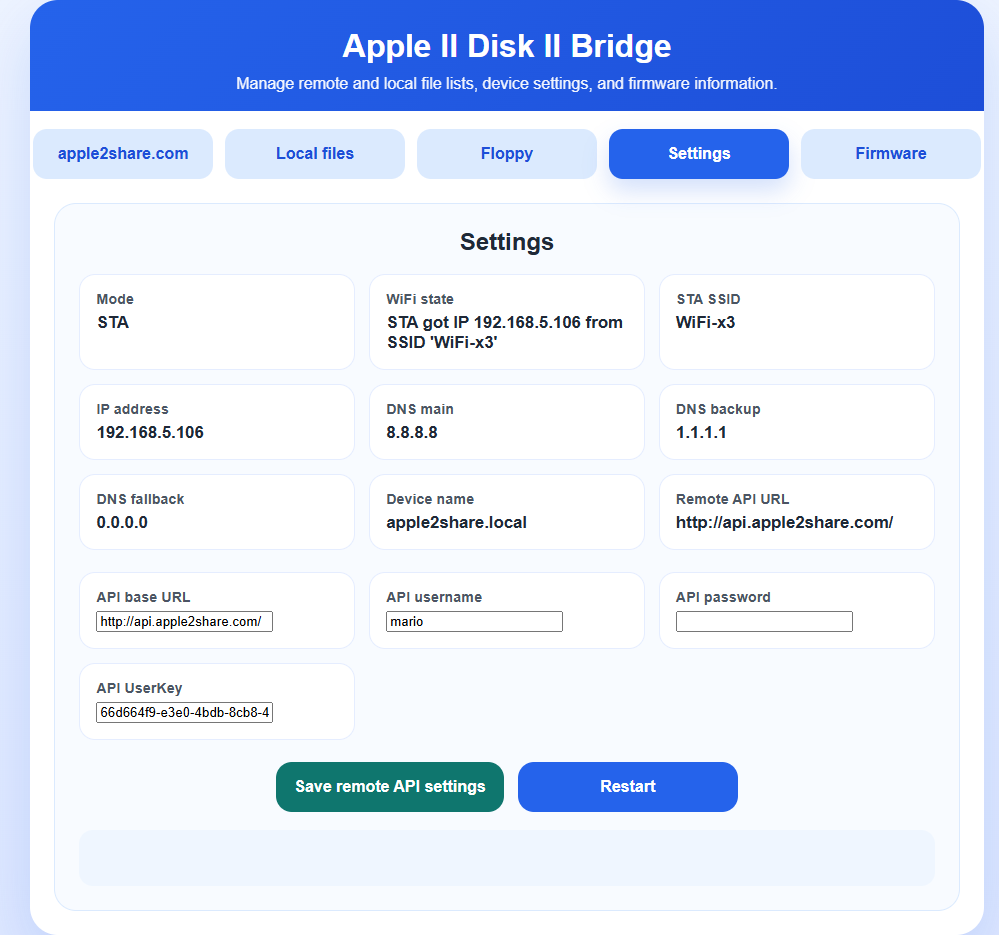
Verify the DNS values after Wi-Fi connects. The API base URL must include http:// or https://. Select Save remote API settings after changing the values, then use Restart if required.
Floppy
The Floppy page lists disk-image files available on the SD card. Select Mount to mount a disk image for the Apple II, or Delete to remove a file from the SD card.
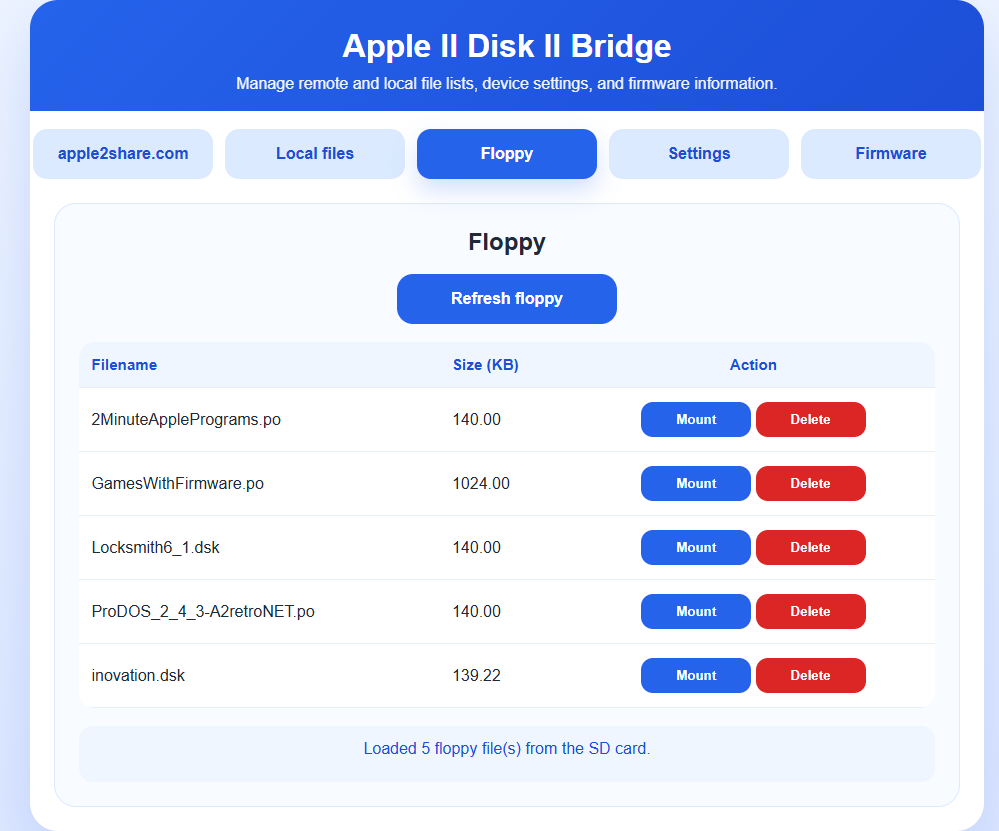
Use Refresh floppy to reload the SD-card file list. The status message below the table shows how many floppy files were found.
Firmware
The Firmware page shows the current firmware version and the access-point (AP) SSID used during device setup. Select Update to start a firmware update when a compatible update is available.
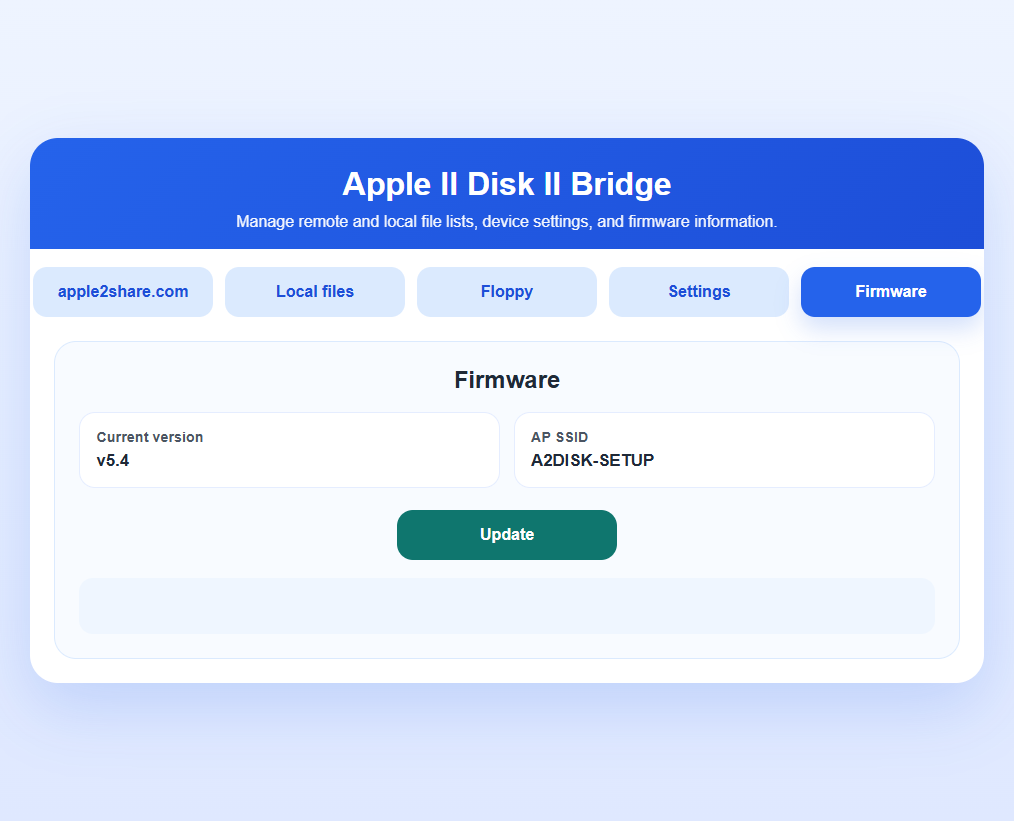
In this example the current firmware version is v5.4 and the setup network SSID is A2DISK-SETUP.
Troubleshooting
- If
api.apple2share.comcannot be resolved, check the DNS values and Wi-Fi gateway. - If the API returns
401 Unauthorized, verify the username, password, and UserKey. - If the device web page does not open, check the active IP address and that the computer is on the same network.
- Use the serial monitor to inspect Wi-Fi, DNS, URL, and remote HTTP diagnostics.